Showing posts with label Helpful Hint. Show all posts

Wednesday, March 25, 2015

It's Cupcake Time

Have you ever needed double-sided cardstock for a project, but couldn't find the right pattern or color for your project?

That's what's SO great about Doodle Pantry digital sets. Not only do you receive beautiful images (color and B&W) and sentiments, but you also get several coordinating papers ~ both patterns and solids.

I wanted to make a cupcake holder that I saw . . . somewhere~on some blog or on YouTube. But I didn't have the "right" double-sided cardstock.  Enter the Yummy Cupcake Digital Set by Doodle Pantry.


I created my double sided cardstock by printing a full page of one digital paper pattern, flipping the cardstock over and printing a coordinating digital paper on the other side.  There are lots of possibilities with this set.

Yummy Cupcake

After die-cutting the pieces (sorry, the die cut is no longer available), I ran the solid brown through an embossing folder to create the "lines" in a cupcake wrapper.  Then glued the DSP "top" to the "bottom," added a bit of ruffled ribbon and pearls and placed a ribbon through punched holes in the top to hold it all together.


I printed 2 pre-colored cupcake images; cut one out completely and cut just the "frosting" out of the second to pop it up.  The sentiment is from the set also (punched with a tag punch), matted in brown and placed on the DSP that I used on the inside of the cupcake holder (the reverse side of the tag has the little sprinkles).


There are so many possibilities using digital images. Hop on over to the Doodle Pantry store for your next digital set or check out the Doodle Pantry blog to see wonderful inspirations from the DT.

I'm entering the following challenges:

Monday, May 27, 2013

Getting Creative

When I got home from work today, I really should have buckled down and finished putting away the few remaining items from the carpet install. However, my Craft Room called out to me...and, well, as a fellow crafter, I'm sure you can understand my dilemma.

Yea!!  The Craft Room won out!!  But mainly because I saw this uber cool Challenge at Catered Crop...create something using Yellow. And being from the Sunshine State (and it was very sunny today), I just knew I had to get in on this Challenge.

Mellow Yellow Mosaic
 
So, I 'crafted' instead of 'cleaning.' And here is my final creation...

 
It may not look bright yellow on the screen, but believe me, it's bright yellow.
 
The flower is from the Stampin' Up Secret Garden set. I stamped it with VersaMark Watermark Ink, sprinkled clear embossing powder over the image and heat embossed it. Then I sponged over the image first with Memento Dandelion Ink, then just in the center with Memento Canteloupe Ink. I highlighted the center dots with Stampin' Up's Peach Parfait marker.
 
The "Hello Sunshine" sentiment is stamped with Memento Dandelion and cut out with a Spellbinder Oval die (as is the yellow cardstock from DCWV). I embossed a piece of white cardstock just to add some depth and keep the floral theme.
 
Now came the challenge to be creative. I wanted to add some ribbon, but I didn't have any yellow.  None at all. So I cut a strip of white organza ribbon and sponged it with Memento Dandelion Ink. It created a very subtle shade of yellow that I absolutely love.
 
 
 I usually stamp two images when I am heat embossing or sponging (because I always seem to ruin one of them), However, since they both turned out, I now had 2 flowers ...so I decided to add the second one to the inside...keeping the card bright and cheery all around.


Helpful Hint:

  If you can't find (or don't have) a ribbon in your card or stamping color, try sponging a strip of organza or twill tape with ink. You'll get multiple ribbon colors out of just one roll of organza ribbon.

Monday, May 20, 2013

Cardmaking Lesson #1

  Many of you have asked for a cardmaking tutorial. Well, today...that's what I have for you. But please be patient with me as I work on my "written" tutorial skills. It seems SO much easier to show you all of this in person.
 
  Too often I forget to take 'in-process' pictures, but this time I remembered to take a few. So, grab your cardmaking items and follow along.
 
  Here's the card I have for you today.


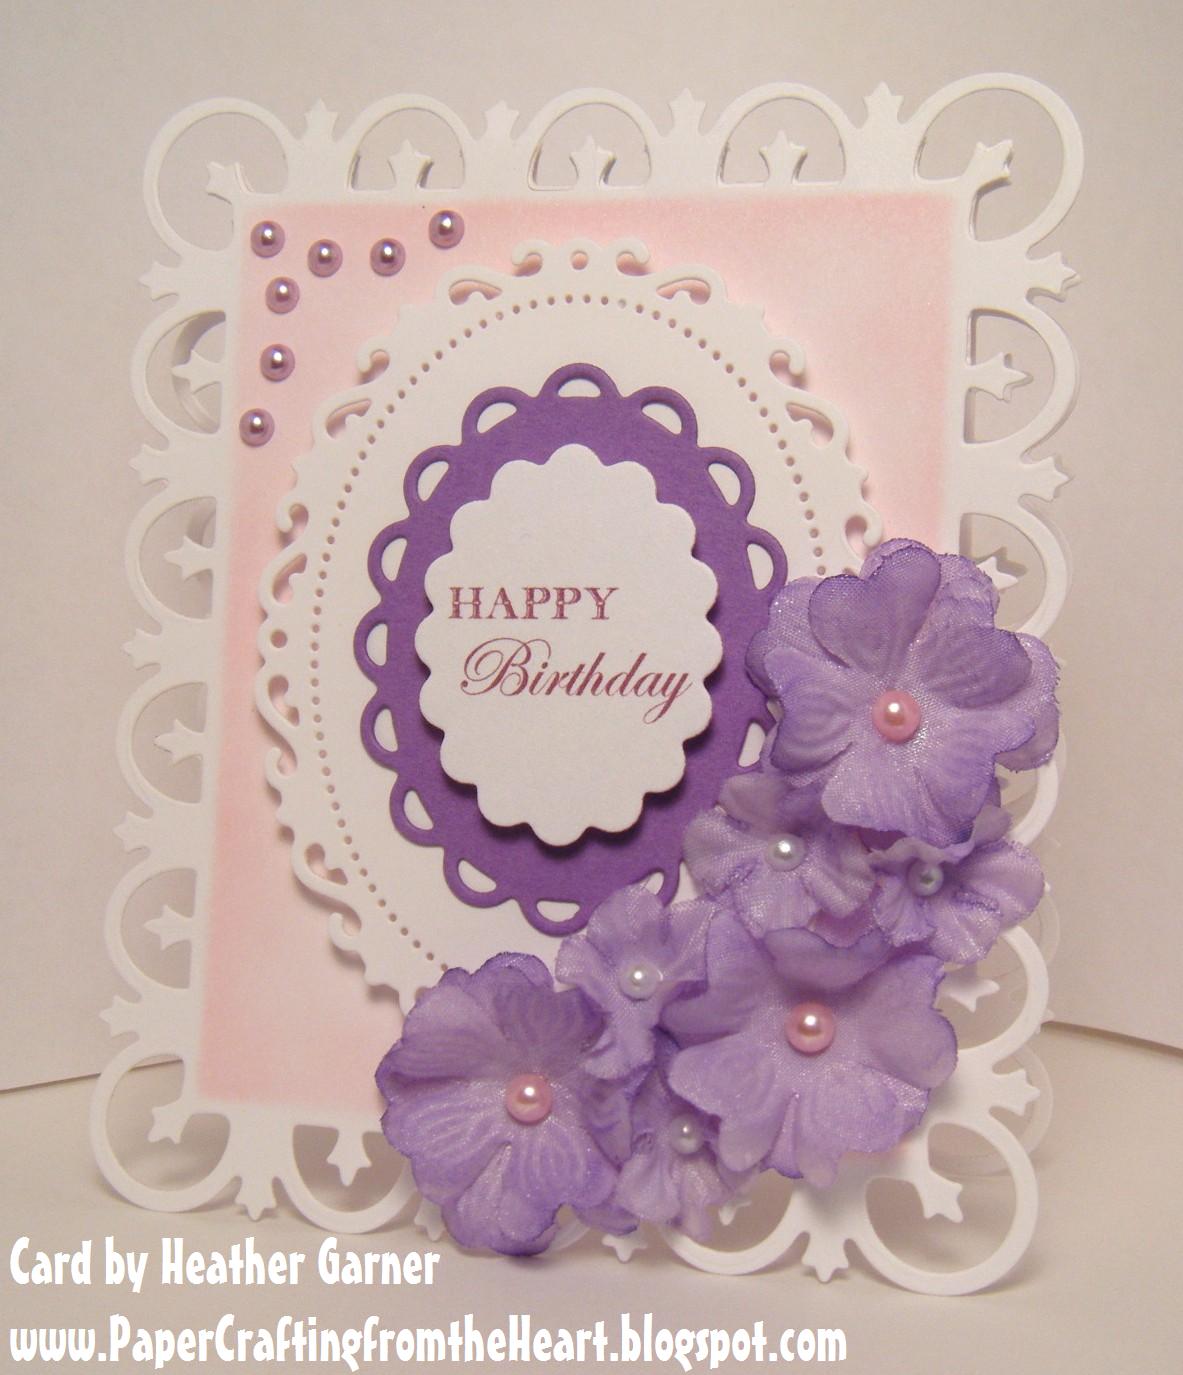
  The card front and back is the largest die from Spellbinder's Fleur de Lis Rectangles set. I created a hinged cutout for the back and a full cutout for the front (I forgot to take a picture of this, so that will have to be a tutorial for another day).
 
  I kept the cutout in the die and sponged Memento Angel Pink from the edge toward the center.


  I used a homemade glitter spray to spritz white silk flowers.  You can make your own glitter spray by mixing some water, a squirt of metallic paint (I used FolkArt Metallic Amethyst) and some glass beads (to aid in mixing) in a spray bottle. 
 
 
You would never know the flowers were originally white.
 
 
I carried the color theme to the inside and added a few additional flowers.


  A couple more die-cuts (Spellbinders Floral Ovals and Lacey Ovals), some well-placed pearls, a Happy Birthday sentiment and the card is finally finished.
 
While I'm at it, I'm entering this card in Catered Crop's Fabric of Friendship Quickfire Challenge. I'm hoping that silk flowers are considered "Fabric."
 

Sunday, April 28, 2013

Using Die-Cuts to Emboss

Note: I have to preface today's post by saying that if you already knew the following information...please humor me and say "wow, how fascinating!" I'm sure there's a LOT of tricks and ideas out there in 'card making land' that I haven't even begun to learn. And, maybe someday I'll be lucky enough to discover something new.

I've been using die-cuts to cut out shapes for quite some time. And, I often emboss the shape with the die-cut once the piece is cut out. However, I thought the other day...I wonder if I can skip a step and just cut and emboss at the same time.

Yup, shortcuts are good...a step saved gives me more time to make another card ;)  So, I used my Cuttlebug machine and here's the order of the plates--from bottom up:
  • A Plate
  • B Plate
  • Spellbinders Die-Cut Medallion One (cut side facing up)
  • Cardstock (champagne metallic)
  • Embossing Rubber Mat
  • Piece of cardboard (from a cereal box)
  • B Plate
Imagine my surprise when I didn't get a cut image, but instead a beautifully embossed image of the die cut. This may not work well for all die-cuts, but it's worth a try. Below is the embossed, non-cut image on the left and the cut shape on the right.


And here is the completed card using the non-cut, embossed image.

 
I repeated the process using Spellbinders Fleur de Lis Rectangles on metallic Blueberry cardstock for the inside of the card.
 

Catered Crop is having a "Make an Impression" challenge (add embossing to your project). And, 365 Cards is also having a challenge "Emboss It" (create a clean and simple card that includes embossing). I'm entering the above card in both challenges.


Tuesday, March 26, 2013

Correcting an "Oops!"

I was creating a card the other day and accidentally had an "oops!" with my ink pad. Normally I would just start over, but this card was just about done and it was for a challenge over at The Play Date Cafe (check it out here). The colors for this challenge, amethyst, emerald and peridot, are absolutely beautiful. So rich and elegant.

After cutting the white cardstock for the sentiment, I inked it slightly to add some emerald color. After I stamped the sentiment, I dropped the stamp on the corner. It's hard to see the ink smudge (in the circle), but it's definitely there.

 
So I got creative, found some patterned paper with the above colors and created a small flower. Actually, I think it balances the card, so maybe this was meant to happen.
 
 
The card front is slightly smaller than the back, allowing the flower strip to show whether the card is open or closed.
 
 
When you have an "Oops!" -- get creative...add ribbon, a flower, a button, a bow, etc. You might be surprised how it enhances your card. Remember, there are no mistakes in cardmaking; it only means the card wasn't finished yet.
 
Items used:
  Cardstock: Emerald, Peridot, White, Metallic Amethyst
  Feathers
  Spellbinders Die-Cut Labels Nine
  Martha Stewart Flower Punch
  EK Border Punch
  Stampology Turquoise Ink Pad
  JoAnn Purple Dye Ink Pad
  Patterned Paper and Brad
 

Sunday, March 24, 2013

Quick and Easy Cards

Do you have a drawer or box full of “stuff” that you don’t use, but you also don’t want to get rid of any of it either? I actually have several…one of which is a drawer of stickers, rub-ons and other embellishments.

     Thank goodness CAS-ual Fridays has a challenge to create a Clean and Simple (CAS) project that doesn’t use stamps—I’m assuming I can’t use any of my “digital” stamps either. Check out the challenge here.

    So I went through the above mentioned drawer to see what I could come up with. And, since it's also a CAS challenge, this is what I put together. Very basic compared to other cards I do, but cute nonetheless.

 
I had a lot of fun putting this card together.  It’s amazing how easy a card can be when all the elements are basically done for you. And, there was nothing to clean up--I really liked that part. Hmmm…I may have to open that drawer a little more often.

Items used:
  Die-Cuts: Spellbinders Lacey Circles and Classic Scalloped Circles Small
  Sentiment: Cloud9 Design Clear Epoxy Stickers
  Pastel Dots: heidi grace designs Borders Rub-ons
  Flower: Greenbrier (yes, it’s from Dollar Tree)
  Cardstock: White, Lilac and Metallic Violet

Helpful Hint:

SRM Stickers is sponsoring the above challenge. If you like to make cards but don't want to buy a slew of ink pads and stamps, check them out by clicking on their name. They have many sayings, images, etc., that "melt" into the paper (not like the vinyl letters we used to use years ago).

Saturday, March 9, 2013

Using Scraps

I can't throw anything away. I know I should, but when it comes to papercrafting I have a hard time tossing the leftover cardstock.
I'm so glad I've kept my extra pieces, because this week's challenge over at CAS-ual Fridays is to use "blocks of color" in your project. Since I have plenty to select from, I decided to use colors suitable for a 'male' card. For some reason, men just don't seem to like a purple or pink card filled with flowers.
  **If you're not familiar with the term CAS, it stands for 'Clean and Simple.'


I used cream cardstock for the base and dark teal blue for the mat. I selected various "manly" colors which I glued down to a cream cardstock mat. I embossed this final piece to give it some texture.
 
The birthday cake is from Bugaboo Stamps. After coloring the image, I used a clear glitter pen to highlight the frosting and candle flame; then fussy-cut the image and used puffies to pop it up.
**I placed the Happy Birthday sentiment inside.
 
There you have it: Quick and Simple...I mean, Clean and Simple. Feel free to hop on over to CAS-ual Fridays blog and submit your own project.
 
 
Helpful Hint:
If you don't have a way to store all your cardstock scraps, this is what works for me. I sort them by color group, with the scraps behind the 8.5x11 sheets. When I need a smaller piece, I look in the scrap folder first before cutting a full-size sheet. I originally used a portable file box, but when I outgrew that, I moved everything to a file drawer.
**I think I need a bigger file drawer since most of the full size sheets are stored in another place.**