Wednesday, November 30, 2016

Christmas Card Challenges #50

No...it's not Sunday.
Yes...I forgot to post my card for this week's challenge at Christmas Card Challenges.

There's still plenty of time to link up your items; maybe this mid-week reminder will get you moving!!  And it's an "Anything Goes" challenge theme, so what could be easier?

This card is not an original idea of mine. I saw it on a Stampin' Up! website but I can't remember where.  I changed up a few things, but kept the basic idea.


Please stop by and see what beautiful creations the other Team members created this week.  


Sunday, October 2, 2016

Christmas Card Challenges # 43

This week we have an optional Photo Challenge for you at Christmas Card Challenges.  I opted to pick up the colors and the pattern of the photo rather than the "cakes" in the photo ~ because I liked the colors and the patterns.  Truth be told, I couldn't find any images of cakes I liked that went with the photo.


See the polka dot background in the photo below?  That's what started the "inspiration" for my card.


You know you should get started on those Christmas/holiday cards, right?  Red and White are so easy to do ... so grab your supplies and get started. Then link up so we can see all your beautiful creations. Click here to see what the Design Team created this week and to link your projects.

Note:  The Weekly Challenge will go live this week on Monday, October 3. See you then.

Would you like to join our fun, easy-going Design Team?  There's a Design Team Call going on right now.  The term runs for 6 months (December through May).  What a great way to get a head start on your Christmas/holiday cards for 2017.  Click here for more information.  The deadline to apply is Friday, October 7. 


Sunday, September 25, 2016

Christmas Card Challenges #42

We have a very easy Challenge this week at Christmas Card Challenges, so I hope you join along.  It's "Anything Goes."   Yes, our challenges do have that "feature" every week, but this week, there's no inspiration photo or color challenge, so you're on your own.  Show us your beautiful creations.


This card was so fun to make that I made several to add to my stash.  I popped up the front panel using foam tape and also popped up the ornament.


Stop by the Christmas Card Challenges site to see what the other Designers created this week for your inspiration.

We also have a Design Team Call going on right now.  The term runs for 6 months (December through May).  What a great way to get a head start on your Christmas/holiday cards for 2017.  Click here for more information.  The deadline to apply is Friday, October 7. 


Sunday, September 18, 2016

Yes, I've been absent for nearly 3 months.  Life just "happens."  But, even though I may not always understand why things happen the way they do, I do know that God gives me the strength I need, when I need it, to get through each situation.

I do have to add "WHERE DID THE SUMMER GO?"  Yes, I am yelling that!! I can't believe we are near the end of September already. Which means I have to get cranking on my Christmas cards.

And what better way to get started than at Christmas Card Challenges.  The Challenge this week is a Color Challenge; although the only real rule is that you create a Christmas or holiday card.  I'm back with the Design Team and am looking forward to sharing my Christmas items with you the next several months.


I used an image from LOTV's Bumper Art Pad Set 29-Vintage Christmas (sadly, this, and others, are no longer available...oh, how I wish they'd bring them back).  I distressed all the pieces with Tim Holtz Distress Ink-Vintage Photo.

I took a little bit of liberty with the colors, but they are close.


Check out what the other Design Team members created this week. It won't be long before we have to get these cards in the mail.

Sunday, June 26, 2016

Christmas Card Challenges #30

I've been away for a few weeks spending a wonderful time with family and friends in Michigan. The irony is that for several days Michigan was actually hotter than where I live in Florida. I was looking forward to cooler weather...and didn't get it as often as I would have liked.

Now that I'm home, it's time to get busy crafting again. This week at Christmas Card Challenges it's "Anything Goes."  So grab your supplies and get busy making those Christmas Holiday cards.

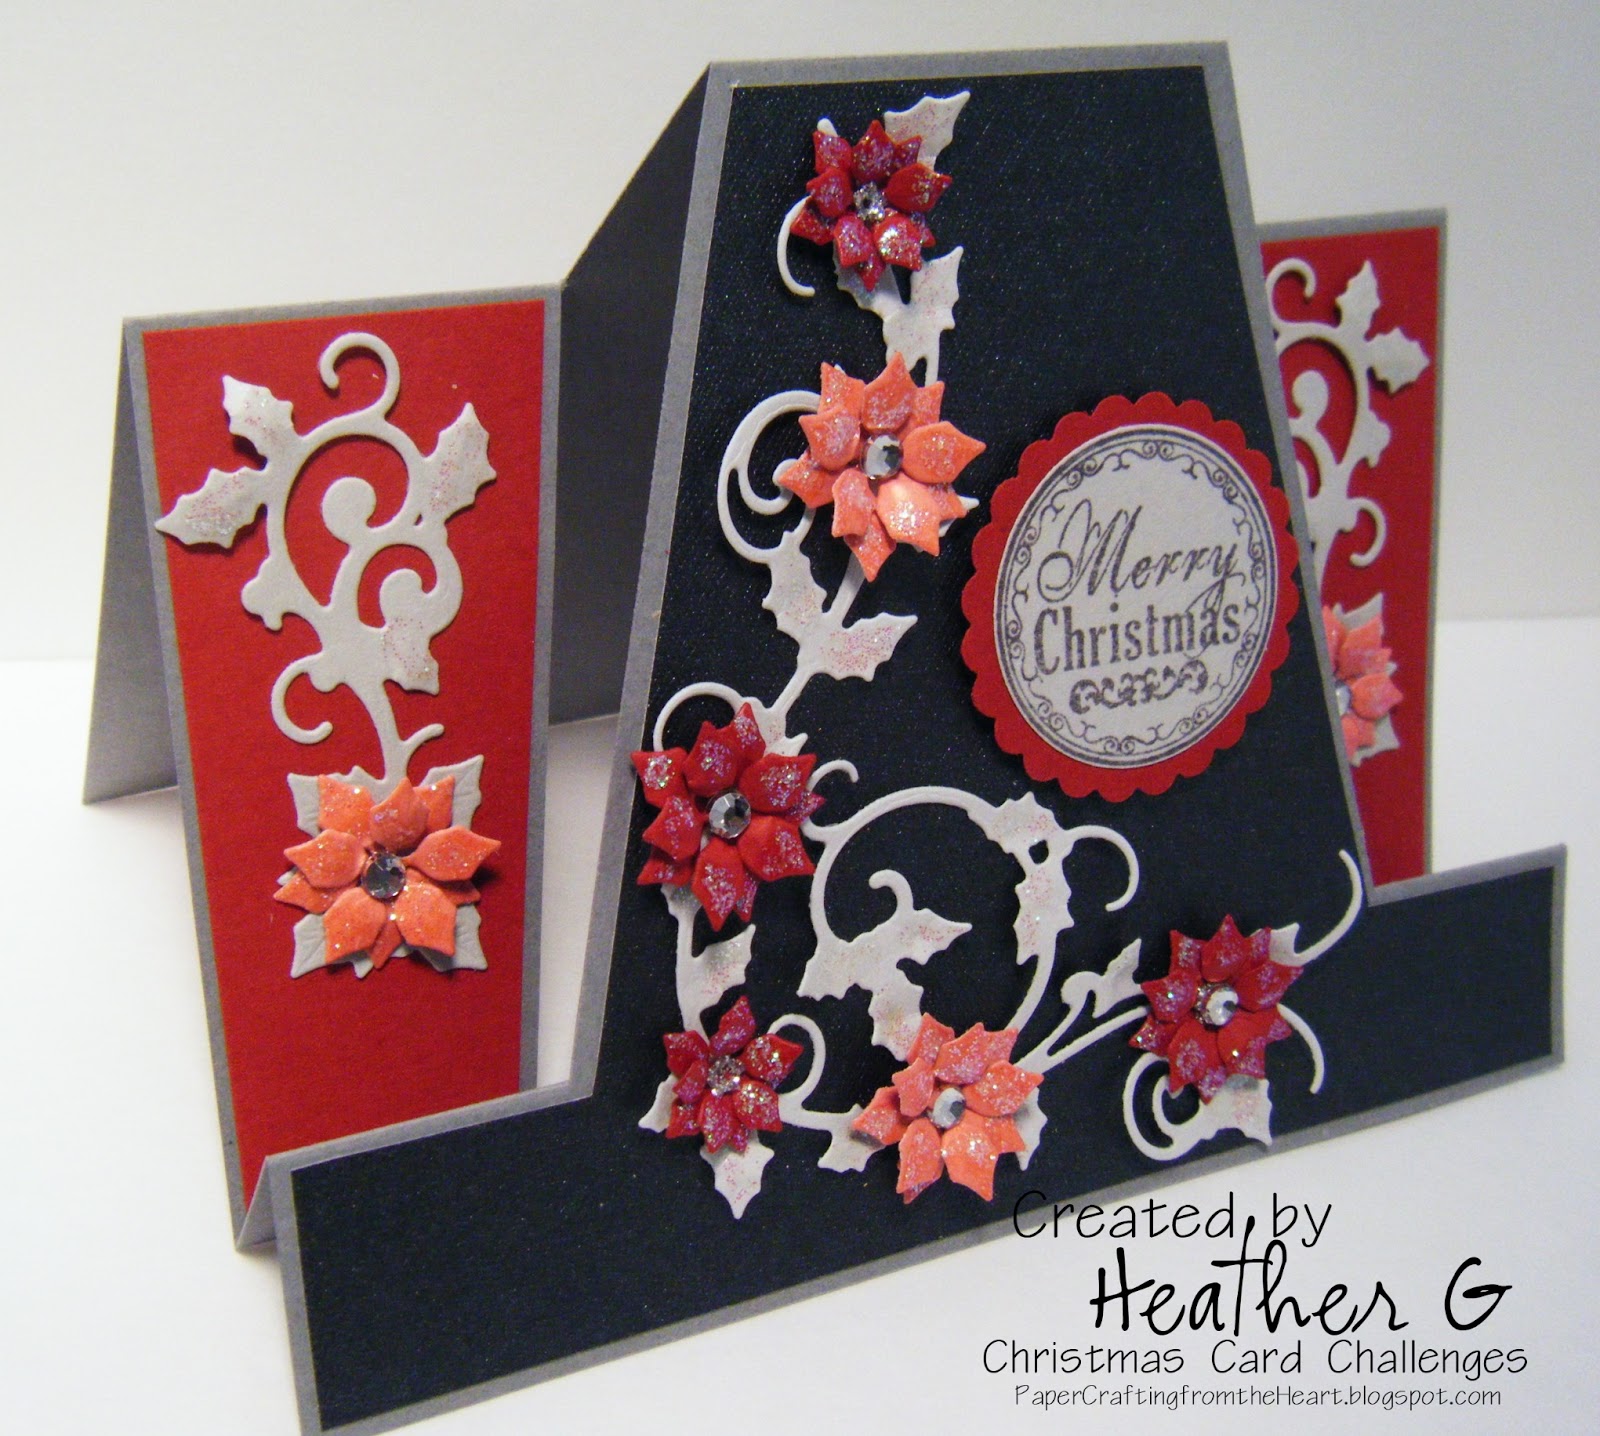
I did a twist on the standard Center Step Card. And I'm including the pattern so you can make one yourself.  If you do, please leave a link to your card in the Comments below. Or, if it's a Christmas card, link it up to the weekly Christmas Card Challenges.  I'd love to see what you create.


Ready to get started? 


 Start with cardstock 8.5" x 4.25"  On the wrong side, measure and mark where the dots are on the pattern.  I'll try to explain it, but hopefully the visual will fill in any gaps.

All measurements are from the left edge and create the red line: 
1" from the left and 1" up from the bottom (and down from the top)
4.25" from the left and 1.75" up from the bottom (and down from the top)
5.25" from the left and 1.5" up from the bottom (and down from the top)

Draw two straight lines to connect these three dots  (red line) 
Draw a straight line to connect the left and far right dot (blue line)

Using an exacto (or your favorite cutter), cut on the red and blue lines to remove the triangle

The score lines are indicated by the black lines on the pattern (don't mark these, just score them):
Score at 1", 2" and 5.25" DOWN to the cut line (from the top) and UP to the cut line (from the bottom).  

Score at 4.25" between the cut lines

Flip the cardstock over (so your marks are on the inside).  Starting at the left edge (where your 1" score line is), your folds will be mountain, valley, mountain, mountain.


To mat the card, I just repeated these steps on an accent color and trimmed it smaller for the dark grey piece.  


For the burgundy pieces, I cut a piece 3-1/8" long by 1-3/8" at the top and 1" at the bottom. Be sure your "straight edge" is on the left on one piece and the right on the second piece.


I added a place to write a note on the back (5-3/8" x 3-1/8").


Decorate the front however you want ... and you're done.


I hope you join us this week.  We're almost into July and before you know it, it'll be time to mail out those Christmas cards.  Wouldn't you love to have a stash ready to go?

Click here to see what the other Designers created this week for your inspiration.


Sunday, May 15, 2016

Christmas Card Challenges #24

We're starting a new "term" at Christmas Card Challenges soon (June), but we have a few new Designers working with us right now.  So, hop on over to the Challenge blog (click here) to see all the inspirational items this week.

Then, get your crafty supplies out and start working on your Christmas cards, tags or gifts.  We'd love to have you join us and since this week is "Anything Goes," it's the perfect time to show off your beautiful creations.


Lots of distressing, but a very simple design.


And I kept the inside simple also.


I liked the design, so I created a 2nd card using punched ornaments.  Yes, they're "floating" in space, but adding hanging threads just didn't look right on this card...although I think I like the poinsettia card better.


I can't wait to see what you create. 


Card Front Sentiment: Word Art Digital Stamp
Card Inside Sentiment: Stampin' Up!
Ornament Stamp: Dollar Bin Stamp
Poinsettia Die: Darice
Ornament Punch: Stampin' Up!
Distress Ink: Tim Holz Vintage Photo

Adding this card to:

Sunday, April 17, 2016

Christmas Card Challenges #20

The weeks are flying by so fast. Which means, before we all know it, Christmas will be here and you'll wish you had ALL of your cards done and ready to go ~ actually Thanksgiving, which is when I send out my cards. So, why not get started NOW and join us this week at Christmas Card Challenges.


We have an optional Photo Challenge to get you inspired. But the only real rule to play along with us is to create a Christmas/holiday card.  


I chose to go with the greys and red colors; and I threw in a tad bit of yellow for the birds. 

 I heat embossed the image using Stampin' Up! Smokey Slate embossing Powder. It gave it such a soft color, that instead of using Copics to color the image, I decided to watercolor it using pencils and ink.  It almost looks like a piece of Vellum is over the image due to the softness of the image/coloring.


Please don't look too close at the picture. I know, it looks like Santa has a glob of something stuck to his mustache.  But he doesn't.  For some reason, the EP came out darker in just that one area (ugh!!) and since I was in a rush (nothing new there, right?) I had to go with what I had.

Hop on over to see what the other Designers created this week and grab your craft supplies and join us. We love to see what you create!!